
Introduction
A leaking roof can quickly turn from a small nuisance into a costly disaster. Water stains on your ceiling, mold growth, and structural damage are all signs that immediate roof repair is necessary. Fortunately, when it comes to asphalt shingle roofs, the most common residential roofing system, many leaks are surprisingly simple to fix.
If you’ve noticed missing shingles, curling edges, or water dripping after a storm, you’re likely dealing with minor shingle damage rather than a full roof replacement. In many cases, simply reattaching loose shingles or replacing damaged ones can restore your roof’s integrity and prevent further water intrusion.
In this comprehensive guide, you’ll learn exactly how to repair a leaky shingle roof, what tools you’ll need, when to DIY versus calling a professional, and how to prevent future leaks. Whether you’re a homeowner looking to save money or someone wanting to understand roofing maintenance better, this article will provide practical, actionable advice rooted in industry best practices.
Understanding the Basics of Roof Repair for Shingle Roofs
Before starting any repair, it’s important to understand how shingle roofs work and why leaks happen.
Asphalt shingles are layered in overlapping rows, creating a waterproof barrier that channels water off your roof. When shingles are cracked, missing, or poorly secured, water can seep beneath them and reach the underlayment or decking. Common causes of shingle roof leaks include:
- Wind damage that lifts or tears shingles
- Hail impact causing cracks or granule loss
- Aging shingles becoming brittle
- Improper installation
- Failed flashing around chimneys or vents
- Nail pops exposing small holes
Key roofing components to know
- Shingles (top protective layer)
- Underlayment (water-resistant barrier)
- Roof decking (structural base)
- Flashing (metal strips preventing water intrusion)
- Roofing nails and sealant
Understanding these components helps you pinpoint the exact source of a leak. Often, the problem is localized to a small area, making targeted roof repair possible without replacing the entire roof.
Signs Your Shingle Roof Needs Repair
Not all roof damage is obvious. Early detection can save thousands in structural repairs. Start by inspecting both the interior and exterior of your home.
Interior warning signs
- Water stains on ceilings or walls
- Peeling paint near rooflines
- Damp attic insulation
- Mold or mildew smells
Exterior warning signs
- Missing shingles
- Curling or buckling shingles
- Cracked or torn tabs
- Exposed nail heads
- Granules collecting in gutters
Even minor shingle damage can allow water infiltration. After heavy storms, it’s wise to conduct a visual inspection from the ground using binoculars.
If you’re unsure, a professional roofing contractor can perform a roof inspection to assess whether simple roof repair will solve the issue or if deeper damage exists.
Tools and Materials Needed for Roof Repair
Preparation is essential before climbing onto your roof. If you have the right tools, you can fix something safely and well.
Essential tools
- Roofing hammer or claw hammer
- Pry bar (flat bar)
- Utility knife
- Caulk gun
- Roofing nails
- Ladder with stabilizer
- Safety harness
Materials
- Replacement shingles (matching color and type)
- Roofing sealant or asphalt roofing cement
- Roofing underlayment (if needed)
Roof Repair Tools and Their Uses
| Tool/Material | Purpose | DIY-Friendly? |
| Pry Bar | Lifting damaged shingles | Yes |
| Roofing Cement | Sealing cracks and edges | Yes |
| Replacement Shingles | Replacing missing/damaged shingles | Yes |
| Flashing | Sealing roof penetrations | Moderate |
| Safety Harness | Fall protection | Essential |
Always prioritize safety. Roofing accidents are common, and proper fall protection is non-negotiable.
How to Reattach Loose Shingles
Loose shingles are one of the easiest roof repair issues to fix.
Wind can break the adhesive seal that holds shingles flat against the roof surface. If the shingle is intact and undamaged, reattachment is simple.
Steps to reattach shingles
- Carefully lift the loose shingle.
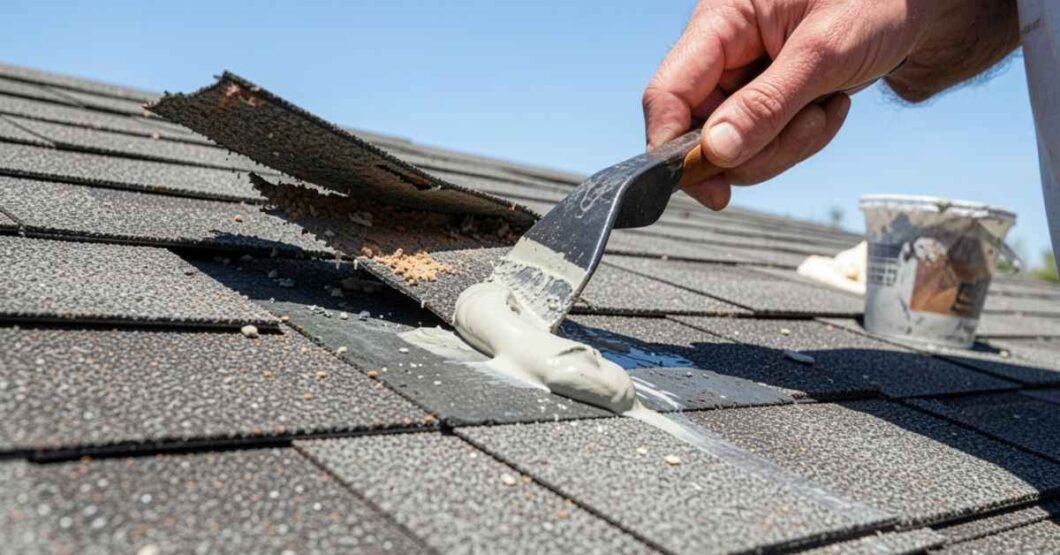
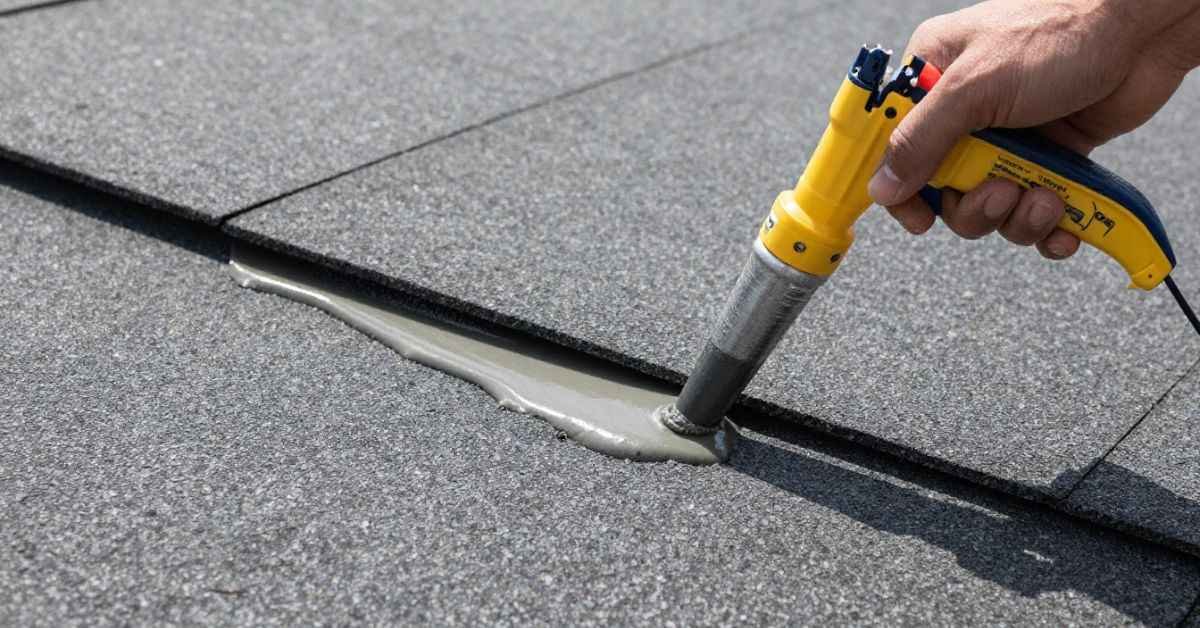
- Apply roofing cement underneath.
- Press the shingle firmly into place.
- Add a small bead of cement along the edges.
- Apply pressure for several seconds to secure adhesion.
If nails are loose:
- Remove the old nail.
- Replace it with a new roofing nail slightly above the original hole.
- Seal the nail head with roofing cement.
This quick repair can extend the life of your roof and prevent water from entering beneath the shingle layer.
How to Replace Damaged or Missing Shingles
When shingles are cracked, curled, or missing entirely, replacement is necessary.
Here’s how to replace a damaged shingle step-by-step:
- Use a pry bar to lift the surrounding shingles.
- Remove nails from the damaged shingle.
- Slide the old shingle out.
- Insert a new matching shingle into position.
- Secure with roofing nails.
- Seal nail heads and edges with roofing cement.
Pro Tip: Match the replacement shingle type (three-tab vs. architectural) for uniform protection.
If the underlayment beneath is wet or torn:
- Cut out the damaged portion.
- Install a new patch of underlayment before placing the shingle.
This method restores the roof’s protective barrier efficiently and cost-effectively.
Common Roof Leak Areas Beyond Shingles
Sometimes the issue isn’t the shingles themselves.
Other vulnerable areas include:
- Chimney flashing
- Roof vents
- Skylights
- Valley intersections
- Pipe boots
Water often travels before dripping inside, so the visible leak may not be directly below the problem.
Case Study: Flashing Failure
A homeowner noticed a ceiling stain near the fireplace. Inspection revealed cracked flashing around the chimney not damaged shingles.
Solution:
- Removed old flashing
- Installed new metal flashing
- Applied waterproof sealant
The total repair cost was under $300, compared to a potential $5,000 structural repair if ignored. This highlights the importance of inspecting all roofing components during roof repair.
DIY Roof Repair vs. Hiring a Professional
Not all roof repairs should be DIY.
Consider these factors:
DIY is suitable when:
- Damage is minor and localized.
- Roof pitch is moderate
- You have proper safety equipment.
- The weather conditions are dry and calm.
Hire a professional when:
- The roof is steep.
- Structural damage is suspected.
- Leak source is unclear
- Large sections are affected
Cost Comparison Table
| Repair Type | DIY Cost | Professional Cost |
| Reattach shingles | $20–$50 | $150–$300 |
| Replace 5–10 shingles | $50–$150 | $300–$600 |
| Flashing repair | $75–$200 | $400–$1,000 |
Professional roofers also provide warranties and follow OSHA safety standards. For complex issues, consult certified contractors via organizations like the National Roofing Contractors Association (NRCA.org).
Preventing Future Roof Leaks
Emergency roof repairs are less likely to happen when you do regular upkeep.
Best practices include
- Annual roof inspections
- Cleaning gutters regularly
- Trimming overhanging tree branches
- Checking attic ventilation
- Replacing aging shingles promptly
Proper attic ventilation prevents moisture buildup and extends shingle lifespan. Regular upkeep is much cheaper than repairs that need to be done right away because of neglect.
Weather Damage and Emergency Roof Repair
Storms are a leading cause of shingle roof damage.
Common weather threats
- High winds
- Hailstorms
- Ice dams
- Heavy rain
After severe weather
- Inspect for missing shingles
- Check for granule loss
- Look for dented flashing
Temporary emergency fixes include:
- Covering exposed areas with tarps
- Applying roofing cement to active leaks
However, permanent repairs should follow as soon as possible.
Extending the Life of Your Shingle Roof
If you take care of your asphalt shingles, they should last between 20 and 30 years.
To maximize lifespan
- Address minor issues immediately
- Use high-quality replacement shingles
- Ensure proper installation
- Maintain ventilation and insulation
- Schedule professional inspections every 2–3 years
A well-maintained roof not only prevents leaks but also improves home value and energy efficiency. Small, proactive roof repairs today can prevent full roof replacement tomorrow.
FAQs
How long does a roof repair take?
Minor shingle repairs can take 1–2 hours. Larger repairs may require half a day.
Can I repair a roof leak from inside the attic?
You can temporarily patch leaks internally, but proper repair must be done on the exterior.
How do I match replacement shingles?
Check manufacturer details or bring a sample to a home improvement store.
Is roof repair covered by insurance?
Insurance may cover storm-related damage but not normal wear and tear.
How often should I inspect my roof?
At least once a year and after big storms.
Conclusion
A leaking shingle roof may seem alarming, but in many cases, it’s a manageable issue that requires simple and targeted roof repair. By identifying damaged or loose shingles early, reattaching them properly, or replacing them with matching materials, you can restore your roof’s protective barrier without the expense of a full replacement.
We’ve explored everything from tools and step-by-step repair methods to preventative maintenance strategies and professional cost comparisons. The key takeaway? Prompt action prevents bigger problems.
If you’re comfortable working safely at heights and the damage is minor, DIY roof repair can save money. However, for complex issues or steep roofs, hiring a certified roofing professional ensures long-term durability and peace of mind.